折腾 NAS

记录了我折腾 NAS 的相关问题和解决方案。

有线 mesh

  1. 子路由连 lan 口
  2. 关闭 DHCP
  3. 子路由修改 wifi 名字和主路由相同

在此之后,子路由会重启,然后就无法再次登录子路由的管理界面了。连着子路由,tracert 也不会显示子路由的 ip。

要做到无缝切换,需要整个过程中 ip 地址是不变的,因此主路由和副路由需要在同一个网段里面。

外网访问

为了实现快速的外网访问,有几种思路:

  1. 使用一个服务器转发
  2. 类似 ZeroTier 的 VPN 方案
  3. 直接使用公网 IP

对于后两种方案,需要:

  1. 首先实现“光猫改桥接”,然后使用路由器拨号。这样,光猫只会负责光信号转电信号,路由器实际上是整个家庭网络的边界了。
  2. 开启路由器的 UPnP 功能。

ZeroTier

1
2
3
4
5
6
7
8
9
sudo ./zerotier-one -q listpeers
200 listpeers <ztaddr> <path> <latency> <version> <role>
200 listpeers 0........7 35.xxx.xxx.2/21028;6114;6114 233 1.14.2 LEAF
200 listpeers 3........0 - -1 1.14.0 LEAF
200 listpeers 7........0 103.xxx.xxx.66/9993;37205;51942 269 - PLANET
200 listpeers c........9 - -1 - PLANET
200 listpeers c........4 185.xxx.xxx.145/9993;37205;90674 170 - PLANET
200 listpeers c........7 79.xxx.xxx.187/9993;14;14 149 - PLANET
200 listpeers ........0 - -1 1.14.0 LEAF

光猫改桥接

对于移动来说,路由器拨号的账户是手机号,密码可以打 10086 重置密码。

FRP 相关

直接转发

1
./frps -c ./frps.toml

在 nas 上,其中 5005 是 nas 上的 webdav 的 port

1
2
3
4
5
6
[[proxies]]
name = "file"
type = "tcp"
localIP = "127.0.0.1"
localPort = 5005
remotePort = 15000

不过这里建议使用 cyberduck 而不是 windows 的原生文件管理来做,因为 windows 文件管理很有 bug。

部署服务(打洞)

阿里云服务器只需要

1
2
3
4
5
6
7
8
9
10
serverAddr = "alicloud_addr"
serverPort = 7000

[[proxies]]
name = "calvin"
type = "tcp"
localIP = "127.0.0.1"
localPort = 22
remotePort = 6000
token = "xxx"

nas 上可以部署不同的协议。这里比较推荐的是 xtcp,可以打洞。stcp 的安全性好,下面的例子是 stcp

1
2
3
4
5
6
7
8
9
serverAddr = "alicloud_addr"
serverPort = 7000

[[proxies]]
name = "p2p_ssh"
type = "stcp"
secretKey = "xxx"
localIP = "127.0.0.1"
localPort = 22

然后只需要即可运行,在不需要的时候,其实可以把这个进程 kill 掉,这样比较安全,毕竟是通过外网打洞

1
./frp/frpc -c ./frp/frpc-s.toml

在客户端,需要

1
2
3
4
5
6
7
8
9
10
11
# frpc.toml
serverAddr = "alicloud_addr"
serverPort = 7000

[[visitors]]
name = "p2p_ssh_visitor"
type = "stcp"
serverName = "p2p_ssh"
secretKey = "xxx"
bindAddr = "127.0.0.1"
bindPort = 6000

在远程,只需要

1
.\frpc.exe -c .\frpc.toml

打洞成功有下面这个日志,但是需要注意,这里不要让他通过 ZeroTier 等转发,不然实际上是没打成功。

1
[p2p_5005] get natHoleRespMsg, sid [xxx], protocol [quic], candidate address [...], assisted address [...], detectBehavior: {Role:sender Mode:3 TTL:0 SendDelayMs:0 ReadTimeoutMs:5000 CandidatePorts:[{From:28106 To:28120}] SendRandomPorts:0 ListenRandomPorts:0}

WebDav

Windows 访问 Nas 上文件只能借助于 WebDav。

在 Nas 上安装 WebDav Server 是很简单的。

HKEY_LOCAL_MACHINE\SYSTEM\CurrentControlSet\Services\WebClient\Parameters 上的 BasicAuthLevel 要改成 2。
Windows Defender 上需要新建入站规则,将 15005 和 15006 端口打开限制。

1
2
3
4
5
6
7
8
9
10
11
12
13
14
15
16
17
[[visitors]]
name = "..."
type = "xtcp"
serverName = "p2p_5005"
secretKey = "..."
bindAddr = "127.0.0.1"
bindPort = 15005
keepTunnelOpen = false

[[visitors]]
name = "..."
type = "xtcp"
serverName = "p2p_5006"
secretKey = "..."
bindAddr = "127.0.0.1"
bindPort = 15006
keepTunnelOpen = false

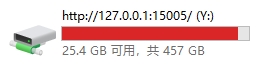
搞完连上去是这样的,容量显示的是本地磁盘的,应该是什么 bug。

xtcp 的体感是连上去一会就断,所以复制个文件,看到的是波动特别明显。

n4 打洞

1
python3 n4.py -c -h <公网服务器>

全局梯子

OpenClash

下面是第一个配置的截图。总共有 10 张图,修改 url 来查看其他的图。

覆写设置 -> 开发者选项

1
2
3
4
5
6
7
8
9
10
11
12
13
14
15
16
17
18
19
20
21
22
23
24
25
26
27
28
29
30
31
32
33
34
35
36
37
38
39
40
41
42
43
44
45
46
47
48
49
50
51
52
53
54
55
56
57
58
59
60
61
62
63
64
65
66
67
68
69
#!/bin/sh
. /usr/share/openclash/ruby.sh
. /usr/share/openclash/log.sh
. /lib/functions.sh

# This script is called by /etc/init.d/openclash
# Add your custom overwrite scripts here, they will be take effict after the OpenClash own srcipts

LOG_OUT "Tip: Start Running Custom Overwrite Scripts..."
LOGTIME=$(echo $(date "+%Y-%m-%d %H:%M:%S"))
LOG_FILE="/tmp/openclash.log"
CONFIG_FILE="$1" #config path

#Simple Demo:
#General Demo
#1--config path
#2--key name
#3--value
#ruby_edit "$CONFIG_FILE" "['redir-port']" "7892"
#ruby_edit "$CONFIG_FILE" "['secret']" "123456"
#ruby_edit "$CONFIG_FILE" "['dns']['enable']" "true"

#Hash Demo
#1--config path
#2--key name
#3--hash type value
ruby_edit "$CONFIG_FILE" "['experimental']" "{'sniff-tls-sni'=>true}"
#ruby_edit "$CONFIG_FILE" "['sniffer']" "{'sniffing'=>['tls','http']}"

#Array Demo:
#1--config path
#2--key name
#3--position(start from 0, end with -1)
#4--value
#ruby_arr_insert "$CONFIG_FILE" "['dns']['nameserver']" "0" "114.114.114.114"

#Array Add From Yaml File Demo:
#1--config path
#2--key name
#3--position(start from 0, end with -1)
#4--value file path
#5--value key name in #4 file
#ruby_arr_add_file "$CONFIG_FILE" "['dns']['fallback-filter']['ipcidr']" "0" "/etc/openclash/custom/openclash_custom_fallback_filter.yaml" "['fallback-filter']['ipcidr']"

#Ruby Script Demo:
#ruby -ryaml -rYAML -I "/usr/share/openclash" -E UTF-8 -e "
# begin
# Value = YAML.load_file('$CONFIG_FILE');
# rescue Exception => e
# puts '${LOGTIME} Error: Load File Failed,【' + e.message + '】';
# end;

#General
# begin
# Thread.new{
# Value['redir-port']=7892;
# Value['tproxy-port']=7895;
# Value['port']=7890;
# Value['socks-port']=7891;
# Value['mixed-port']=7893;
# }.join;

# rescue Exception => e
# puts '${LOGTIME} Error: Set General Failed,【' + e.message + '】';
# ensure
# File.open('$CONFIG_FILE','w') {|f| YAML.dump(Value, f)};
# end" 2>/dev/null >> $LOG_FILE

exit 0

注意,和 PS5 相关的要走 DIRECT

1
2
3
4
- DOMAIN-SUFFIX,playstation.com,DIRECT
- DOMAIN-SUFFIX,playstation.com.hk,DIRECT
- DOMAIN-SUFFIX,playstation.net,DIRECT
- DOMAIN-SUFFIX,playstationnetwork.com,DIRECT

Meta Quest 相关